
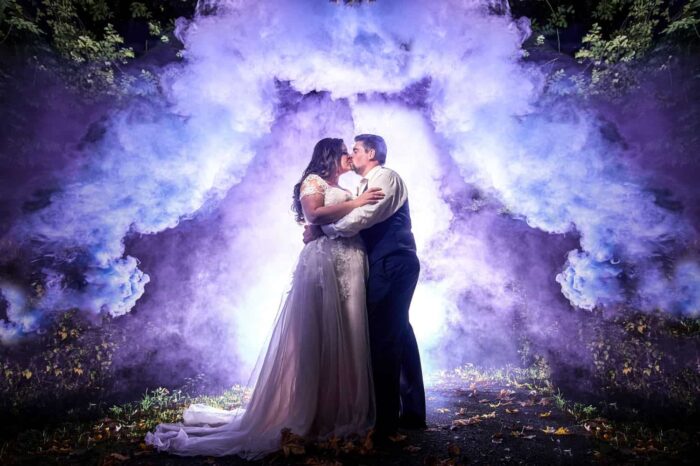
Do you want to add unique and creative photos to your photography portfolio? Look no further than smoke bomb photography! You can create amazing, dynamic images by adding colored smoke to your shots. This article provides all the info you need to get started.
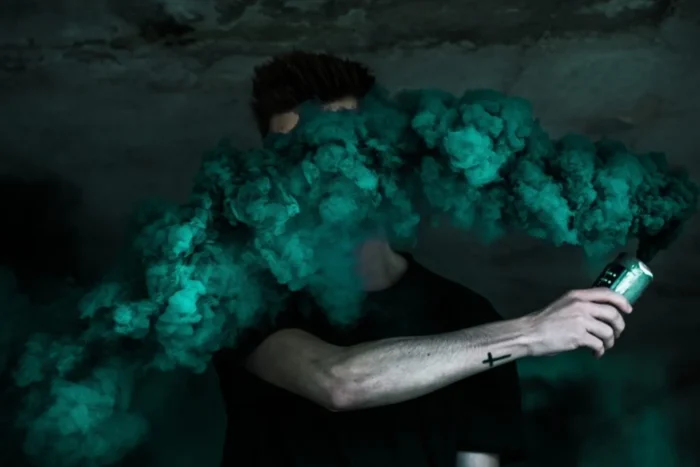
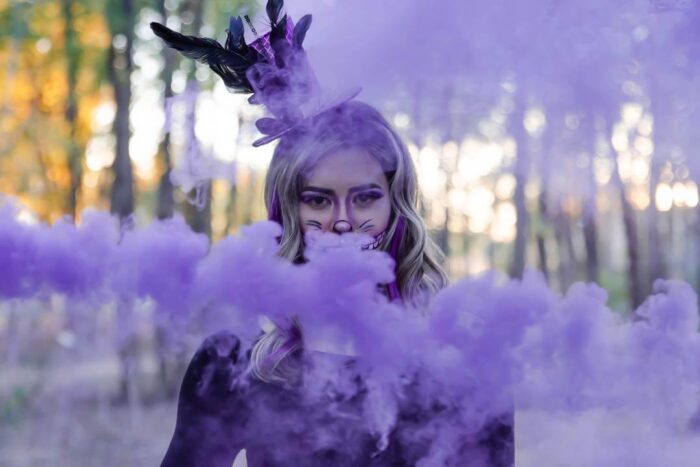
Smoke bomb photography has recently become a popular way to add a unique visual element to photos. This technique combines the vibrant colors of smoke bombs and the creative staging of props to create stunning photos that capture motion in time. If you are looking for an interesting angle to spice up your photos, smoke bomb photography may be worth exploring.
Choosing the Right Bomb
For vibrant and cinematic results, choosing the right smoke bomb is an important part of achieving your smoke bomb photography goals. They come in a variety of shapes, sizes, colors, and effects – so we’ve compiled comprehensive lists to help you find the best option for your project!
True Smoke Bomb Form

These are generally cylindrical in shape and can range from 1-4 inches in length. They’re generally made with sawdust, charcoal, and other combustible materials to add color to the smoke effect. They require lighting from an external heat source and a fan or wind to disperse them effectively.
Tablet Form
Tablets are usually shaped like small discs that can be lit with a lighter directly without having to use an external heat source (unless noted). Tablet-designed products provide objects with more vibrant colors when compared to true smoke bomb form products owing to the denser particles of dye within them.
Multiple Break Form
The most colorful product type available due to multiple breaks in each cylinder which helps disperse more colored dye into the air slower than other forms will do. These kits usually consist of 10-20 individual tubes that contain chemicals combined with vegetable oil or wax so they’ll light without requiring additional fuel sources such as candles etc.
Setting Up the Scene
Although it may appear sophisticated, smoke bomb photography is quite simple with the right preparation — all you need is some basic equipment and a bit of know-how. Here’s how to get started:
- Choose your environment: To make your image stand out, look for outdoor environments with lots of visually interesting elements (such as trees or rocks), or indoor space with minimal clutter. Keep in mind that smoke bombs can result in colorful streaks in any room’s corners or furniture, so you may want to protect antique items and fabrics if appropriate.
- Prepare your equipment: You’ll need an open space to set up your smoke bomb shots, as well as a camera lens suitable for night photography for capturing crystal-clear images without blurriness. Also, be sure to have fresh batteries for the flash attached to your camera and check that the camera’s white balance is set properly — this ensures that the photographs accurately reflect true colors within the actual scene (without deliberate filter effects). Finally, pack extra lenses just in case you decide to switch it up with close-up shots during the session.
- Map out your composition: Because smoke bombs create fleeting moments of color plumes amidst an otherwise dark setting, consider planning out each shot’s composition before you start shooting away with sparks flying all around you. Pick up on details like natural lines or patterns already present in the frame (or use foreign objects such as leaves or paper cutouts to give it more visual interest). This will help keep things organized while also adding layer after layer of creative nuance into each shot — making these portraits all the more memorable!
Tips for Capturing the Perfect Smoke Bomb Photo
First of all, choose your backdrop wisely. Make sure to pick one that will provide enough contrast against the colorful smoke, so that the shots become more visible. Additionally, you should exploit the direction of the wind if possible – by taking advantage of it you can produce great aerial shots where the wisps disperse in beautiful shapes and patterns against blue sky backgrounds.
Next, find a setting where the lighting is perfect. Try using the ‘golden hour’ light when shooting outdoors – this is suitable for pictures taken during sunrise or sunset. Use reflectors or diffusers when shooting indoors to help minimize shadows and harsh highlights on your subject’s face or body for softer-looking photos with a warmer tone. Lastly, experiment with composition techniques like leading lines in order to create dramatic perspective in your images.
Editing Smoke Bomb Photos
Start with adjusting the temperature. The warmer you set it, the more saturated colors will become. Then, adjust the shadows and highlights settings to give them more depth and contrast depending on how it best suits your image.
Increase clarity when needed to enhance details and punch up colors in specific areas of an image by using vibrance and saturation (but be careful not to overdo it). Finally, clean up any noise that may have been caused by slower shutter speeds during low light settings.
Using this editing process as a base, you’ll be able to easily enhance smoke bomb photography for better visuals or add effects for fun and creative reasons. You can experiment with sharpening adjustments or decrease highlights if certain areas are too bright; there is no single “right” way of doing things!
Creative Ideas
Here are some creative ideas for photographing with smoke bombs:
- Color blocking – Create a vivid backdrop that is blocked with color by using two or more colorful smoke bombs placed strategically in the background of the photo. The result could be either dramatic or subtle depending on the colors you choose.
- Blending – Use various combinations of colored smoke powder bombs to create an ethereal blend of color that resembles a cloud-like rainbow. The result is an abstract composition full of movement and depth.
- Ghosting – This technique requires you to move the smoke bomb around while exposing the image continuously. With ghosting, you can achieve memorable long-exposure images by “painting” with colored smoke trails across your frame while blending in exposure settings that are used during long exposures such as daylight or when mounting your camera on a tripod under low light conditions.
- Shapes and Textures – Instead of just having one basic shape like circles, you can also practice creating other shapes out of the smoke as if you’re drawing them in mid-air. You can also add texture by blowing gently onto the colored smoke stream or shaking it vigorously in circular motions so that it branches out into different directions before settling back down again– very useful for bespoke portrait shoots.
Final Thoughts
Smoke bombing operates with a trial-and-error approach —true learning happens in practice. Building on what you’ve learned from each try is essential to maximizing your success. So don’t be afraid to try different styles and settings as you strive for perfection in your smoke bomb photography work.


