
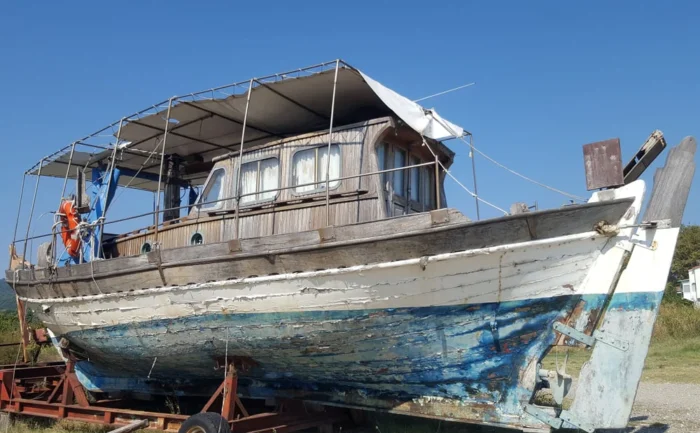
Antique boats are the trend at the moment, and restoring them gives a whole new kick of reward to the experience. Boat restoration is fun and exciting but can also be daunting for beginners. The effort is substantial, and you might need to dedicate a few months, if not weeks, to facilitate the rebirth of its glorious form. And because it cannot be repeated time and again, it requires proper implementation of the correct techniques.
If you want to restore your boat but don’t know where to start, don’t lose hope just yet. The possibility of making an antique boat look fresh out of stock is surreal, and you can do it with just a few fundamentals by your side. This article will familiarise you with the rudiments of antique boat restoration in a step-by-step manner and a few essential tips to assist:
Step 1: Scan And Inspect
The initial step towards a complete restoration is to absorb as much information from scanning the antique. A thorough history and record of the boat can help you in the long run. Ask the previous owner the following questions:
- What’s the history of this boat?
- What repairs and maintenance touches have been done?
- How intense was the usage back when you had it?
- Had the ship sustained any notable damage?
There are always specific measures to take when restoring a boat, including preventing mould, wood-rotting, and engine operations. Don’t hesitate to reach out to a professional when you feel like something is beyond your knowledge and expertise.
Step 2: Set Up Your Workspace And Tools

The next step towards a healthy restoration journey is organising your workspace and acquiring the right equipment. A boat restoration process typically takes two weeks to a whole month, and you might find yourself with woodwork for longer. As such, having a fully functional shed can separate this process and prevent essential tools from missing.
Once you have chosen the designated workspace, the next milestone is to gather the right tools. A beginner must take extra caution when selecting investment materials. This could cost you more than expected, so design a budget and do your cost research beforehand. The wrong materials have the potential to cause injury, both to you and your dearest boat. You might need to check yourself for the following items:
- A pair of gloves
- Durable goggles
- Bolts and nuts
- Screws and fasteners
- Hose and wire clamps
- Pipe fittings
- A ladder
- Sandpaper
A more significant project would demand the following tools as well:
- Rigging replacement alternatives
- Cleats
- Chainplates
- Sails
- Halyards
- Sheets
- Control lines
- Engine batteries
- Polishing
- Winches and Blocks
- Other metal works
Materials vary from boat to boat, and sometimes you might need more than what’s mentioned if you’re working on a more significant project (a yacht, for instance). Shop now the best boating equipment, if you’re an under confident beginner with no solid idea. You should also seek help from a professional.
Step 3: Clean The Boat Through And Through
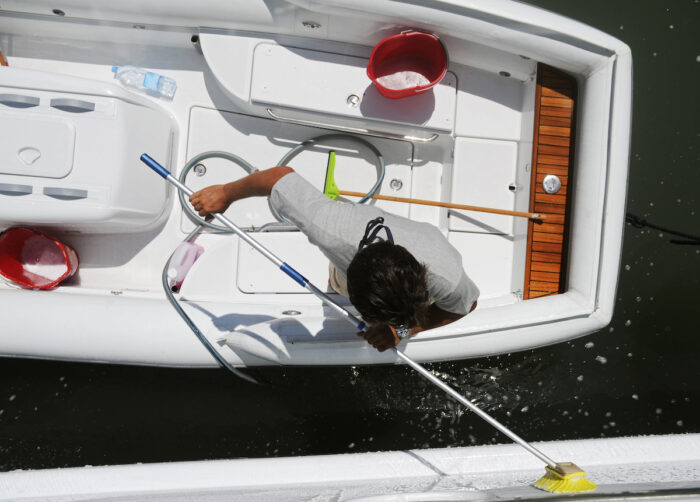
Cleaning boats is essential and the most basic of all the steps discussed. Proper cleansing can help you notice problems that you have overlooked previously. It sets the foundation and gives you something to work on. Make sure you focus on the blocked drainage holes and the bilge components. An ancient boat is nothing without tons of grime and debris; it can become hard to see which parts to restore.
Start from the top of the boat and scrub its entirety with the help of a hose. Make sure the windshields are cleaned with soft hands. While domestic cleaning products work just as well, you might need other cleaners for stubborn dirt. Consider the following homemade options:
- General Cleaner: Mix one cup of vinegar with a gallon of fresh water.
- Stain Remover: Make a paste with baking soda and water.
- Mildew Remover: A 1:1 proportion of salt and lemon acid.
Step 4: Figure Out Components That Need Fixing
This step is essentially a combination of the previous one and goes hand-in-hand. Cleaning makes you inspect parts that require immediate attention and set priorities. Remember that windows are sensitive areas and may require extra attention for replacement. It’s for your best to make a list during circumstances where a logical order is challenging to maintain. A sample list looks like so:
- Hull-fittings: This takes priority. Hull is the heart of the boat, and any hull penetration can attract flooding. Use specialised sealants to recover the hull and repair it.
- Seacocks: They are responsible for cooling the engine and draining the cockpits. A broken one can bring water in and cause the boat to sink.
- Load-bearing fittings: Fixtures like cleats and chainplates stress the deck. These fittings require back plating to prevent damage.
- Halyards and Control lines: They are responsible for damage resistance but can wear out over time. Use non-bio detergents for these areas.
- Sails: They are the most exposed component to environmental conditions. As such, their replacement is vital.
Go over the following areas with a careful eye:
- Sail stitching
- Cringles
- Sail surface and edges
- Mould
- Engine operation
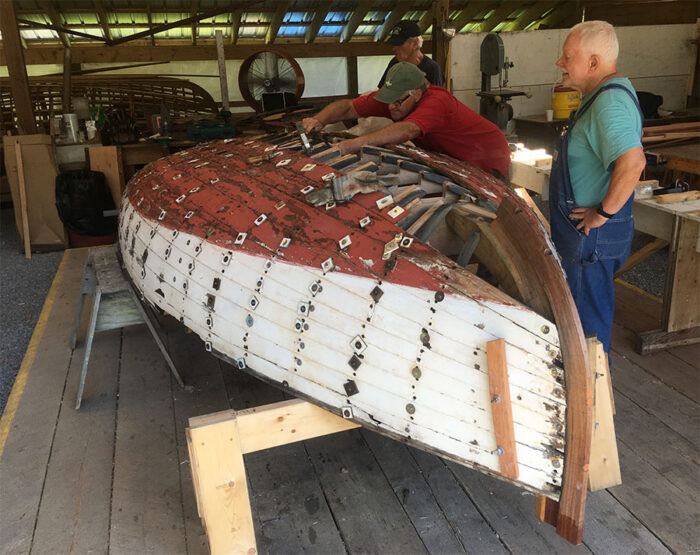
Step 5: Check For Wood Rotting And Mould

Every antique furnishing requires wood replacement because of mould formation and rotting, even if it looks top-notch from the exterior. Start from the deck. Seatings and transoms are prone to sagging and rotting and require careful handling. Remember that their replacement is critical and needs to be done as soon as possible. Consider replacing them with marine-grade materials; plywood and contemporary composites are great alternatives.
Step 6: Change Oil
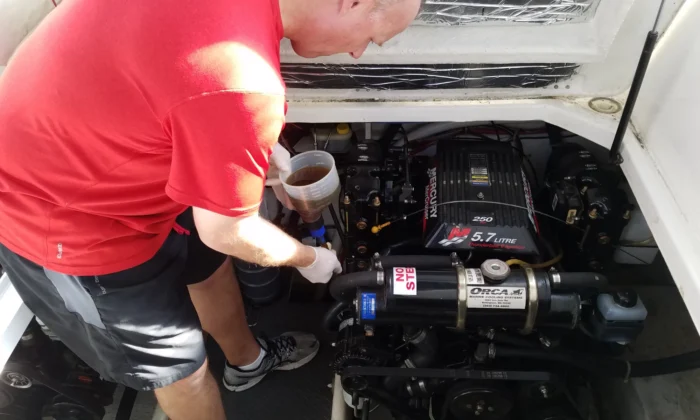
Any remnants of previous fuel can damage the tank to critical degrees. Replace the power from the engine and case gear. Old fuel settles in the container and wastes energy due to an insulating layer forming on the lining. This can wear down the efficiency of fuel usage. Change your spark plug as soon as it catches your eye. Do the following:
- Drain the container
- Fill fresh engine oil
- Fill gearbox oil
- Replace air filters
Seek Professional Help
Antique boat restoration is rarely a successful process without professional help. Always seek external use in areas where you feel you can’t fake it until you make it. Experienced and trained experts can impart their skills and knowledge for a reasonable cost. It is essential to consider this avenue, as prices can get higher when doing them yourself. Do the areas you are comfortable with, and don’t hesitate for professional expertise for the places you require help. Not only are they cost-efficient, but they also reduce repair time and failure risk.
Conclusion
Antique boat restoration requires love, labour, and determination, apart from the right tools and techniques. One thing people don’t tell you about this endeavour is that you need to consider the aptitude required for this job. If you are contemplating the effort being worthwhile, chances are it is. As a pregnant mother who goes through labour forgets all the pain once the baby is born, so is the case with restoring boats to their old pristine value. Remember to focus on the parts that require restoration. It will also enhance resale value if you decide to resell it for a higher price. Following the above steps would do the trick.


